Unity UI Setup Guide
This will guide you through the implementation of Pinnr using Unity UI's Canvas.
Setting Up the Canvas
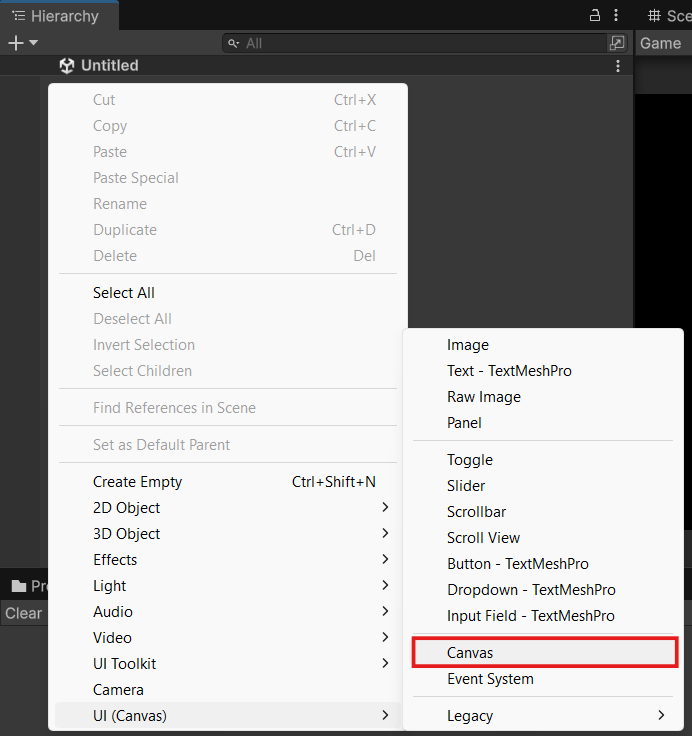
Create a Canvas GameObject by clicking on menu bar GameObject -> UI -> Canvas.
This can also be done by right clicking inside the hierarchy, and select UI -> Canvas.
From the inspector, set the Render Mode of the Canvas to either Screen Space – Overlay or Screen Space – Camera.
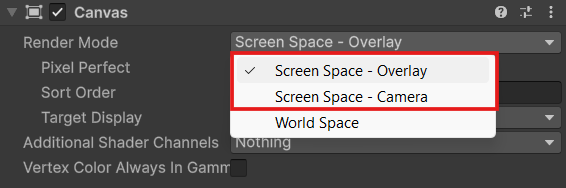
See Additionals section for a special case using World Space Render Mode.
Add a Pinnr Canvas component inside the created Canvas GameObject, by clicking on inspector Add Component -> Scripts -> Calcatz.Pinnr -> Pinnr Canvas.


The properties will be automatically assigned if we properly add the component to a Canvas GameObject. The Camera property will be automatically assigned from the main camera, but in case we want to choose a specific camera, then we can also manually assign the camera reference.
Setting Up the World Space Target Object
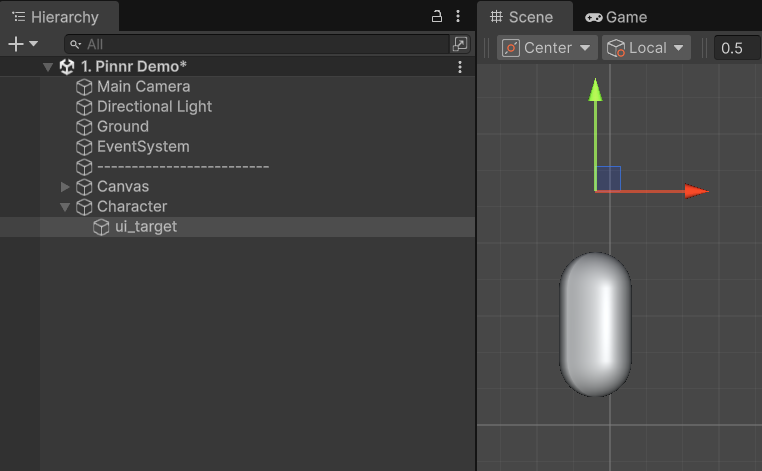
There is no restriction on how we set the world space target object. We only need to specify which Transform to track, and that Transform will be used to determine the position of the UI elements.
In the demo scene, we add a UI element that follows the top of a capsule character. To do this, we create a child GameObject positioned above the character, which is then used as the target for the UI element to follow.
Setting Up the UI Element
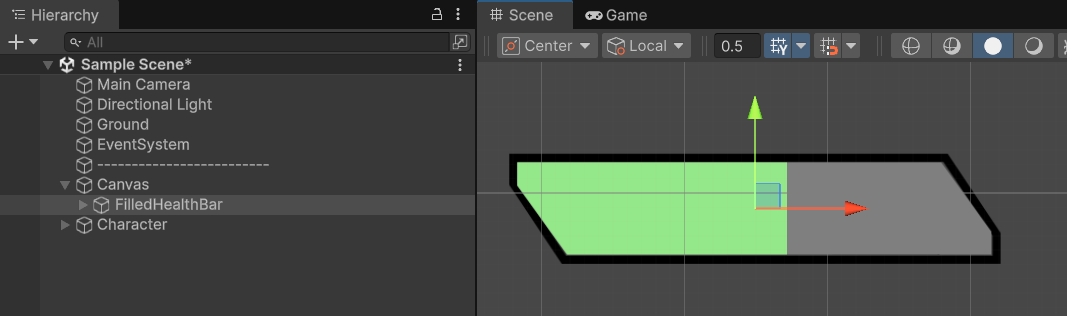
Create any UI GameObject inside the Canvas GameObject, and add a Pinnr Element UGUI component by clicking on inspector Add Component -> Scripts -> Calcatz.Pinnr -> Pinnr Element UGUI.
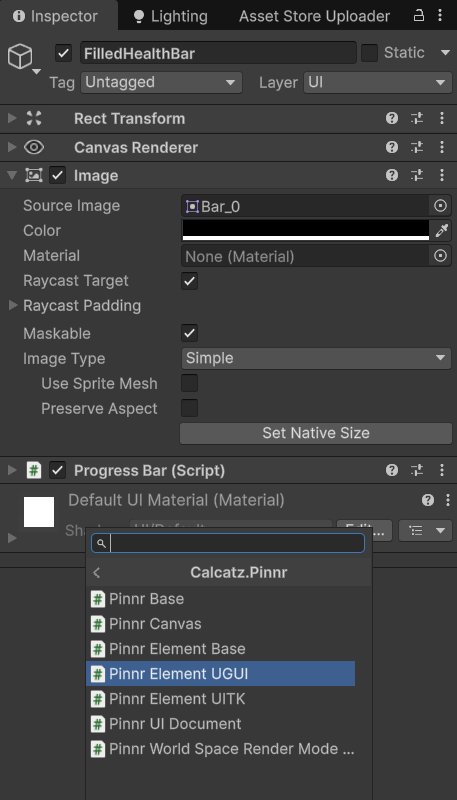
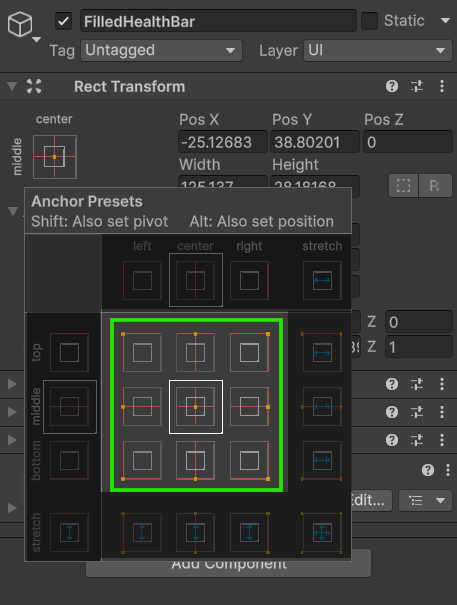
In the demo scene, we used the FilledHealthBar GameObject as an example of a UI element. To make this feature work correctly, the anchor must be set to a Point. We can place the point anywhere, but choosing the middle center is recommended. Also, make sure it is not set to Stretch.
Assign the World Space Target Object that we created before.
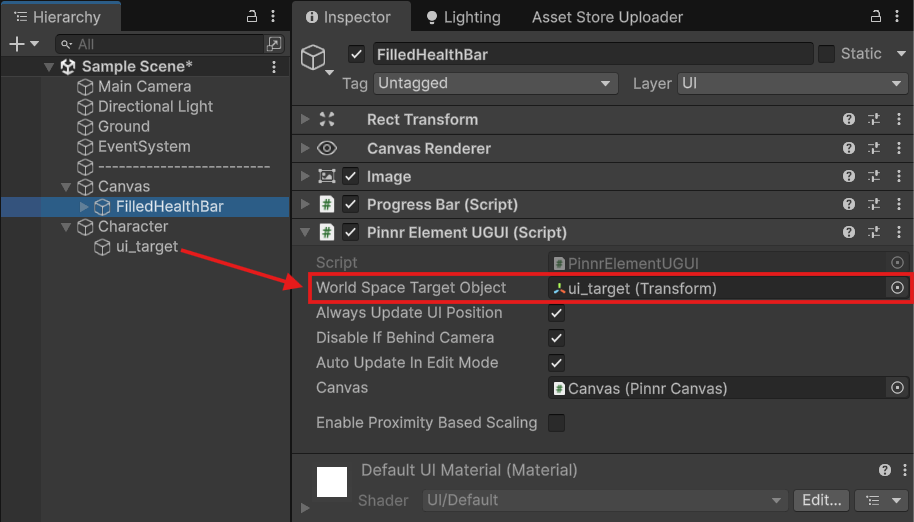
- World Space Target Object: The world space target object that the UI element should follow.
- Always Update UI Position: Update UI position every frame. If our UI element doesn't need to keep following the target, we can choose to disable it for optimal performance, and update the position by script only when needed using the
UpdateUIPosition()method. - Disable If Behind Camera: Disable the behaviour (prevent showing it on screen) if the target object is located behind camera.
- Auto Update In Edit Mode: Auto update position every frame update in edit mode (when the editor is not in play mode).
- Canvas: This will be initialized automatically, as long as the root Canvas GameObject has a Pinnr Canvas component attached. This is required.
- Enable Proximity Based Scaling: Enable this to use proximity-based scaling. This will scale the element based on a distance between camera and the UI element.
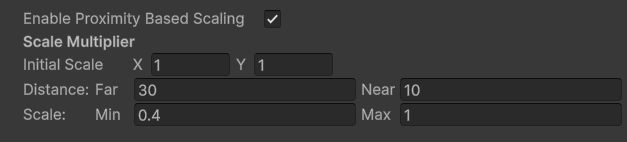
- Initial Scale: Initial scale of the element.
- Distance:
- Far: If the distance between camera and this element is more than or equal to far value, then apply min scale.
- Near: If the distance between camera and this element is less than or equal to near value, then apply max scale.
- Scale: Scale value to apply based on the specified distance values. If the distance is between far and near, then the scale is applied based on the percentage between far and near distance.
- World Space Scale Render Factor (World Space Render Mode only): Scale factor used for world space render mode only.
That is all we need to do, and the UI element we created will follow the target's position.